A classic. A nice warm bowl of chili is the perfect meal after working (or playing) outside on a cold winter day.
I remember every winter as kids we would all go sledding down the big hill by my parents’ house. We’d round up all of the neighbor kids and sled until dark. Then after dark, we’d bring out all of dad’s shop lights and light the hill to sled way into the night. We lived outside, no matter how cold it was.
The best part after hours and hours of sledding mom would always have a big batch of chili ready for us! She makes one of my favorite chili’s, but realizing Dustin doesn’t like beans, we had to switch it up a bit. So here’s my take on this meaty, delicious chili.
The Chili
Start off by slicing your bacon into small pieces and browning in a large soup pot (or large pan if you want to cook in a crockpot). Next, in the same pan brown one pound of ground pork sausage and one pound of ground beef.
Next chop one whole onion, three bell peppers, and two medium carrots and add to the pan. Then slice your tomato and add to the pan along with one can of tomato paste. Add seasonings and beef broth and cook on low for at least 4 hours. – That’s it! So Simple!
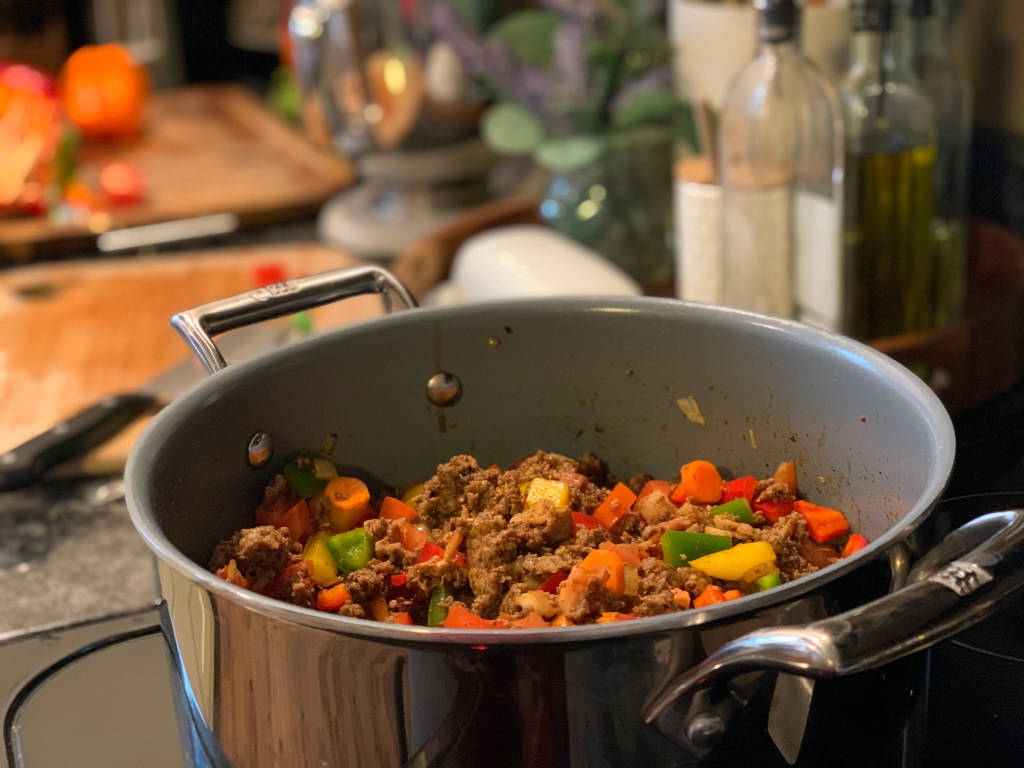
This may not seem like your traditional chili at all but I promise, as it cooks down, it transforms into a tasty, hearty chili!
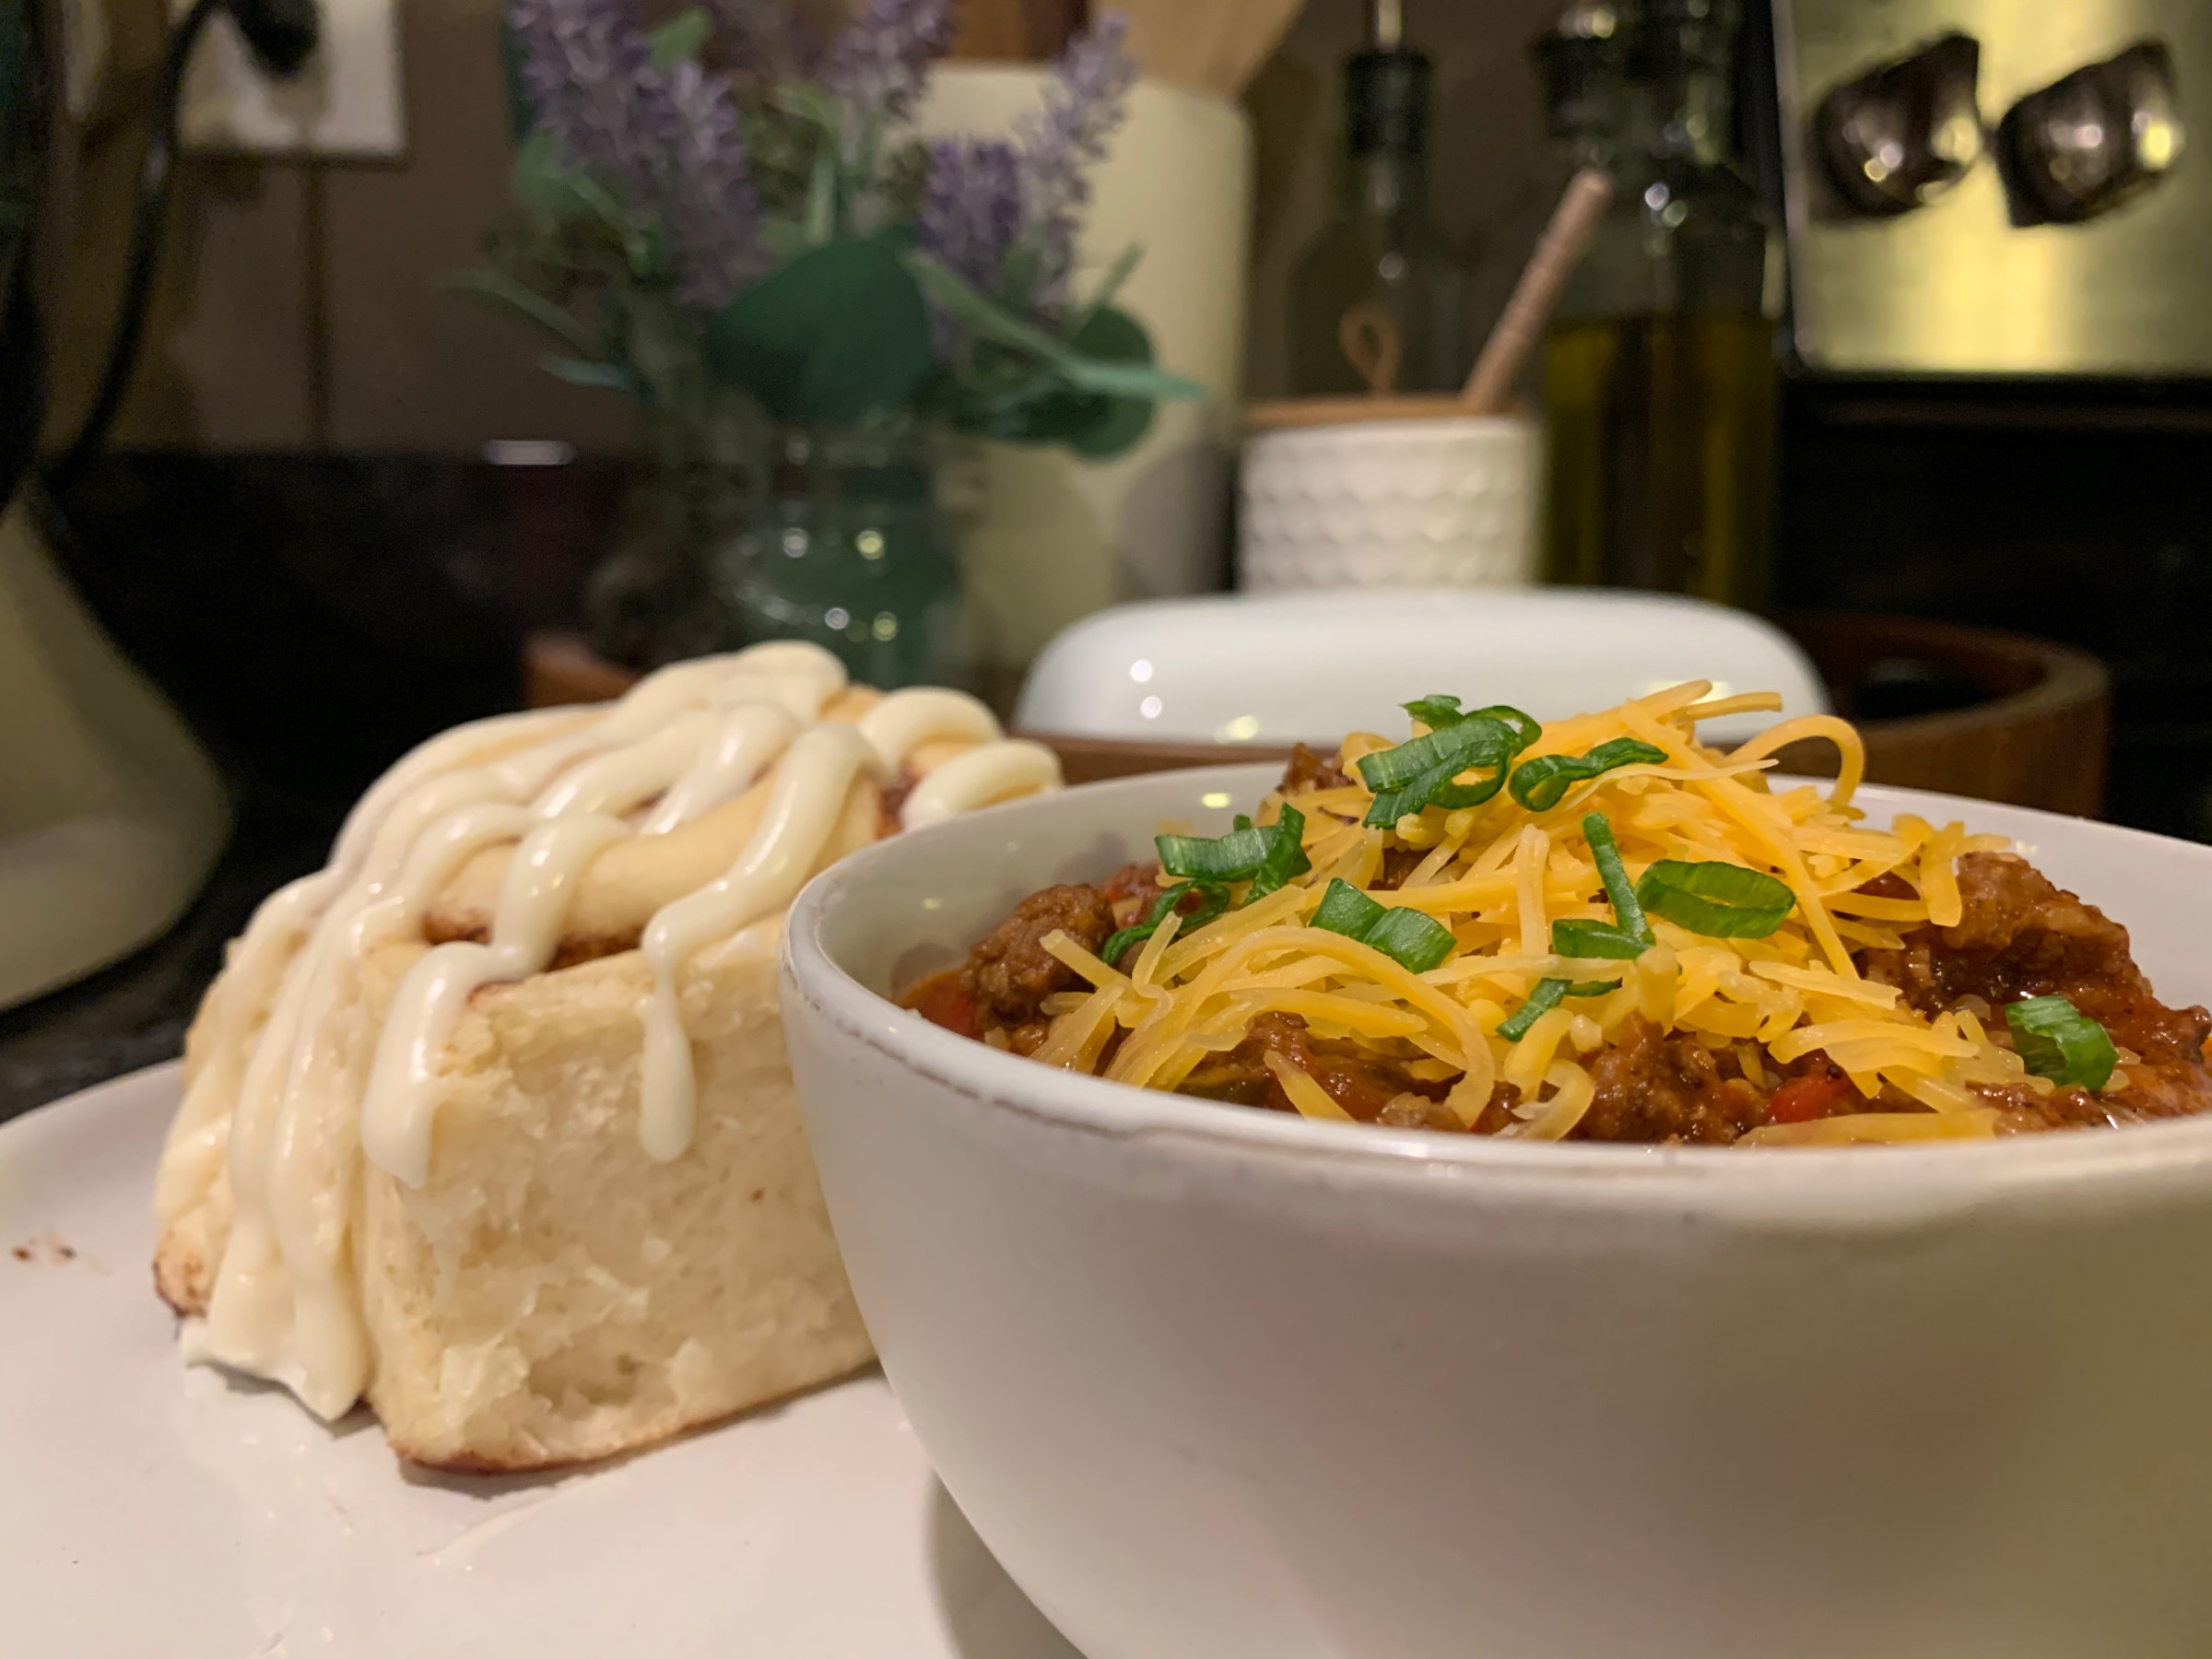
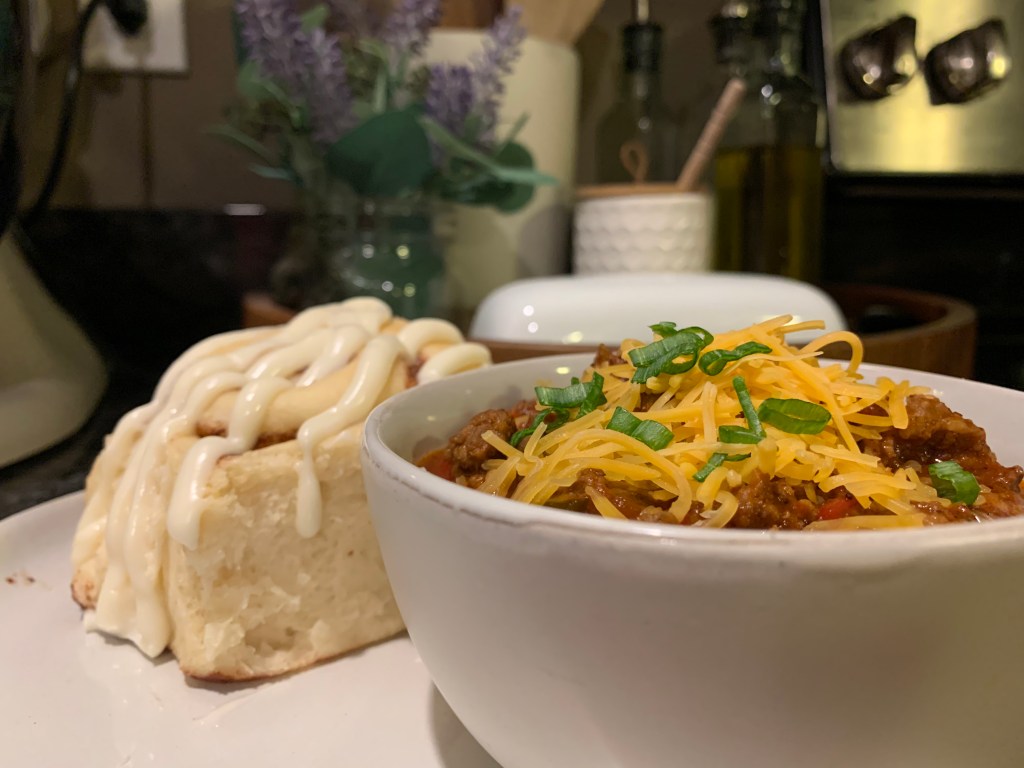
Chili and Cinnamon Rolls
What was served with your chili? My family always had cornbread, or cheese and crackers. We most definitely never had cinnamon rolls. I’ve recently learned that this is an absolute staple in some schools and families. I don’t knock anything until I’ve tried it, and well frankly there’s not much I don’t like. So, I gave the chili and cinnamon rolls the ol’ college try… It was... delicious! Turns out the sweet, soft and spicy combinations actually go quite well together. That’s not to say I’m going to shut down the classic chili and cornbread, but I do highly recommend giving it a chance!
Whether its cornbread, cinnamon rolls, cheese and crackers or another side I hope you enjoy this simple, yet delicious no-bean chili recipe!
With Love, Aleana
Prep Time: 30 Minutes
Cook Time 4 hours Minutes
Total Time: 4 hours and 30 Minutes

Ingredients:
1 lb   Ground Beef
1 lb   Pork Sausage
1 lb   Bacon
1 large   Yellow Onion
3   Bell Peppers
2 Med. Carrotts
1 Large  Beefsteak Tomato
1 Can    Tomato Paste
1/3 C  Beef Broth
1/2 TBS   Chopped Garlic
2 TSP   Salt
2 TSP   Pepper
1 TSP   Chili Powder
1/2 TSP  Cayanne
Directions:

1. In a large soup pot brown chopped bacon.

2. Add pork sausage and group beef and brown.

3. Add chopped vegitables, tomato paste, spices and beef broth.

4. Cook on low for 4 hours.

5. Enjoy

Warm, sweet, buttery, delicious cinnamon rolls; such a simple treat that everyone loves!
Dustin and I aren’t overly big on sweets so when I created this I wanted to make it simple, easy to store and quick to grab when we catch a craving. These homemade cinnamon rolls are the perfect warm and sweet breakfast. When made ahead of time these sweet rolls are great for a lazy Saturday morning plus, you don’t have to be a professional baker!
The Dough
Trust me when I say I’m no professional baker! So, if I can make these you can too!
Let’s get started with the yeast mixture. Start by adding the warm water, sugar, and yeast into a small/medium-sized bowl and gently whisk together (you will want a bowl with room for the yeast to expand!). Let the yeast mixture sit for ten minutes to activate.
Once the yeast mixture is prepared, heat the milk in the microwave for two minutes. Then in a heavy mixing bowl combine the milk, softened butter, salt and sugar, and mix until butter is fully melted and combined. Add eggs one at a time as well as three cups of flour and mix well. Add another two cups of flour and the yeast mixture and mix until all of the flour is combined. Let the dough rest for ten minutes. I like to use this time to switch to a dough hook and clean up a little bit! Continue to mix while slowly adding the remaining two and a half cups of flour. The dough will start to pull away from the sides, but should still be quite sticky. Mix for an additional four minutes.
Once you’re done mixing the dough, coat a large bowl with two tablespoons of oil. Transfer the dough from the mixing bowl to the oiled bowl and coat the surface of the dough. Place a clean towel over the bowl and let rise in a warm spot for fourty-five minutes.
The Cinnamon
While the dough rises, this is a perfect time to clean up your workspace and prepare the filling for the cinnamon rolls! For the cinnamon filling mix, this is up to your discretion. I love the flavor, so I use a few extra ingredients! In a small bowl mix together: white sugar, brown sugar, cinnamon, and nutmeg. Right before the dough is ready to be worked, melt one stick of butter in a small bowl.
- 4 TBS Cane Sugar
- 4 TBS Brown Sugar
- 1 ½ TBS Cinnamon
- ¼ TSP Nutmeg
To Prepare the Cinnamon Rolls:
Once the dough has sat for forty-five minutes, lay dough onto a floured surface. Knead ten to fifteen times making sure to not add too much flour to keep the dough nice and soft.
Using a rolling pin, roll out the dough into a large rectangle, about a quarter-inch in thickness.
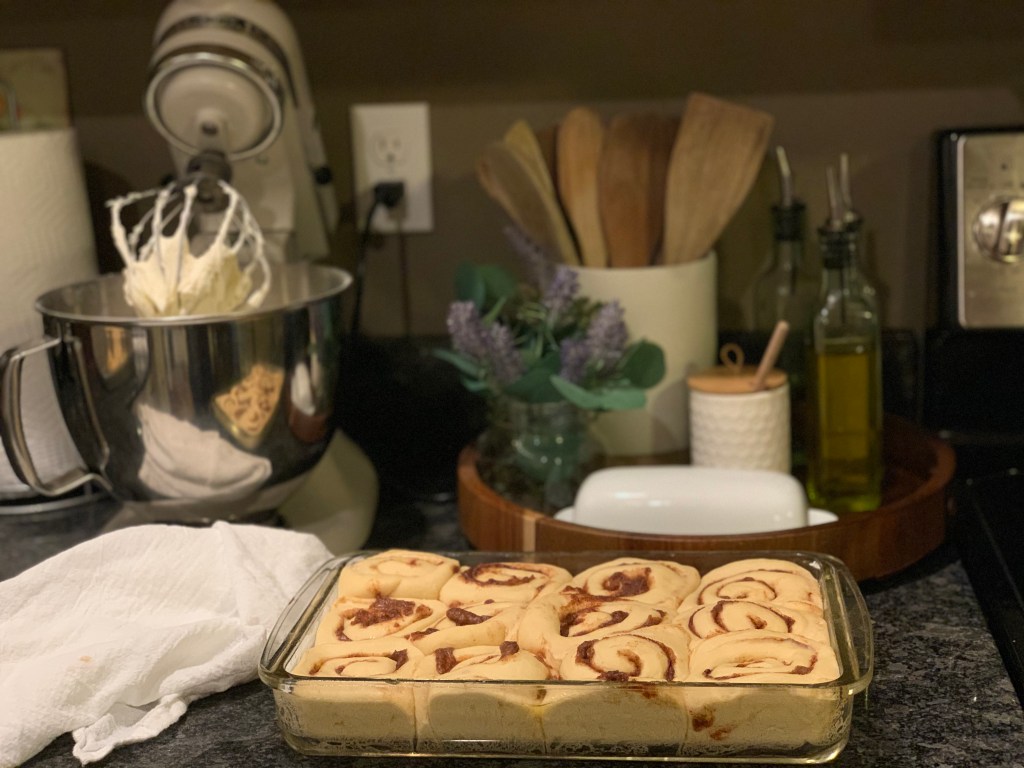
Spread melted butter across the flattened dough, and sift on the cinnamon mixture. Roll up the dough, starting with the long side then cut into one-inch slices using a sharp knife. Place in a greased baking dish.
Now here is where you can decide to send these rolls off to the freezer or the oven!
To Bake the Cinnamon Rolls:
First, let the rolls rise for an additional 45 minutes. Preheat the oven to 325 degrees and bake for 16-20 minutes or until they are lightly brown!
To Freeze the Cinnamon Rolls:
Nows the time to freeze! If you are going to freeze your cinnamon rolls, nows the time! One the rolls are ready (before they rise for the second time) cover the pan tightly with plastic wrap and aluminum foil and place them in the freezer. When you’re ready to enjoy, just remember to allow time to defrost and rise for 45 minutes!
The Frosting
In a large mixing bowl add cream cheese, vanilla, butter, and powdered sugar. Combine until smooth!
- 8 oz Cream Cheese
- 1 TBS Vanilla
- ½ Cup Butter
- ¾ lbs of Powdered Sugar
Frost while warm or frost individually when you’re ready to enjoy! Store in a cool place. Reheat in the microwave for 30-45 seconds to enjoy warm until they’re gone!
I hope you enjoy these soft, sweet rolls with your family.
With Love, Aleana
Prep Time: 20 Minutes
Rest Time: 1 1/2 Hours
Cook Time: 18-20 Minutes
Total Time: 2 Hours 40 Mintues

Ingredients:

Yeast Mixture:
2 TBS   Quick Rise Yeast
1 TBS   Sugar
1 C     Warm Water

Dough:
7 1/2 C   Bread Flour
1 1/2 C   Milk
1/2 C     Butter (Softened)
1/2 C    Sugar
2 tsp    Salt
2       Eggs
2 TBS   Olive Oil

Cinnamon Filling:
4 TBS Cane Sugar
4 TBS Brown Sugar
2 TBS Cinnamon
1 TSP Nutmeg

Frosting:
8 oz Cream Cheese
1 TBS Vanilla
½ Cup Butter
¾ lbs of Powdered Sugar
Directions:
THE DOUGH:
1. Yeast Mixture: In a med.-small bowl gently mix yeast, sugar and warm water. Let sit for 10 Mintues.

2. Heat Milk for 2 Mintues. Set aside.

3.In a heavy mixer combine milk, softened butter, salt and sugar. Mix until butter is melted.

4. Measure out 5 cups of flour.

5. With the mixer on low add eggs one at a time then 3 cups of flour. Mix well.

6. Add yeast mixture and additional 2 Cups of flour. Mix until all of the flour has been combined.

7. Let rest for 10 Minutes. Change out mixer blade for dough hook.

8. Slowly add in additional 2 1/2 Cups of flour. Mix for 3 minutes.

9. Transfer dough to a bowl, coating dough with olive oil on all sides. Cover with tea towel.

10. Place dough in a warm place and let rise for 45 minutes.

Preparing the Rolls
1. After 45 minutes, the dough should have doubled in size!

2. On a lightly floured surface knead dough for 2-5 Minutes, adding flour as needed. (Use as little flour as necessary)

3. Roll out dough to a large rectangle about 1/4 inch thick.

4. Melt 1/2 Cup of butter and spread over the dough evenly.

5. Mix white and brown sugar and Cinnamon together and spread over dough covering the entire surface.

6. Using the long side, roll up the dough and cut into 1/2 - 1 inch slices.

7. Place cut rolls into a greased baking dish and let rise for 45 minutes to an hour.

8. Bake at 325 for 18-20 Minutes or until cooked through. Be carefull not to over cook! You do not want to get them brown.

9. Cover with frosting or frost individually and enjoy!

The Frosting:
1. In a large mixing bowl add cream cheese, vanilla, butter, and powdered sugar. Combine until smooth!

Hello, 2020!
Cheers to a whole new decade! The last decade has been nothing but growth. From graduating high school and college to getting my first “real” fulltime job, to getting married the last ten years had a lot to offer. 2019 was quite the cap of a decade, being one of the best years of my life so far!
2019 has been a rollercoaster and the year of establishment. I experienced so many new things and really settled into life. With all of the different adventures, I’m not sure if anything will be able to top 2019. Check out a few of my favorite things from the last year down at the bottom!
New Decade of Opportunity
Now that Dustin and I are settling into our first year of marriage, we have a few big goals but are also taking more time this year to focus on the day-to-day. The last few years for both of us have been such a race to grow and make our mark, we haven’t taken much time for the “small things”. So, 2020 is going to be the year to focus on those “small” passions.
I’m starting 2020 off with my biggest goal: Organization! From time management and work to our house and health, I want to become more organized with my life around me. I’ve started off getting a nice planner and updating it before the new year even kicked off. My intentions are to take time each Sunday looking at the week ahead. By becoming more organized I can (hopefully) find more time for the “small things” I want to focus on this year.
A few things I look forward to spending energy on are my love for sustainability, low-waste, and gardening. I’ve set myself up for a successful year by making a few swaps already in the realm of low-waste like bar shampoo and conditioner (more details to come!). As for gardening, a few of my herbs did really well this fall (as I neglected so many of them due to chaos of life) while many did not. My intentions are to focus on those herbs I purchase frequently and provide a steady supply of my own!
With 2020 kicking off with some time to prepare for work and wrap up after the holidays, I’m taking the time to lightly map out my year. I look forward to all this year will bring: from our honeymoon to some of our best friends’ weddings to exciting launches at work, I know this year has a lot to offer!
Here’s a quick look into what 2019 had in store for me.
2019 Recap

I took a girls’ trip to Ireland with my mom and sister! 
We adopted the CUTEST puppy, Cedar! 
Hit year two at my dream job and experienced some of the cool places it’s taken me, like Idaho! 
Got Engaged!
And best of all… Got married!

I hope 2019 was a year of growth for you and 2020 brings you new opportunities!
Welcome 2020, a new decade of opportunity.
Love, Aleana

Honey: Noun
Definition: Honey is a sweet, viscous food substance made by bees and some related insects. Bees produce honey from the sugary secretions of plants or from secretions of other insects, by regurgitation, enzymatic activity, and water evaporation
Yep, that’s right, bee barf.
Honeybee’s have been in the spotlight in the last decade as Colony Collapse Disorder (CCD) has been on the rise. CCD can have many causes, some unknown, and is the general phrase to describe the death of a honeybee hive. Over the last decade the rise in backyard beekeepers has skyrocketed, an estimated 4,500 Iowans are actively beekeeping
By nature we are taught to be scared of bees from a very young age. I mean, they do sting, so why would we think any differently. So, why are so many people starting to raise hives of their own, in their backyards? Back in 2006 CCD hit beekeepers hard, making honeybees hit the mainstream media. Today, the loss of hives is still very high, but it’s much easier to purchase a new queen and hive. But the ease of getting new hives doesn’t answer why so many people are so interested in raising bees.
The sweet, sweet reward.
There are three main benefits to raising bees. First, raising bees helps pollinate gardens. Second, raising bees contributes to a higher population of honeybees in the wild. Lastly, the sweet, sweet reward, honey.
Honey bees will travel up to 20 miles to gather pollen from a variety of plants to create honey, that can then be harvested by the beekeepers. The pollen that the worker bees gather is what makes local raw honey perfect for building an immune system, helping with allergies or just providing healthy, locally sourced sugar replacement.
In 2012 my mom started raising honeybees in our backyard along with our family friends, the Benners. It’s not a terribly hard hobby to get involved with; the combination of books and friendly beekeepers helped educate her on the art of raising bees. Her interest piqued when she started working towards edible landscaping. She has loved gardening for as long as I can remember and as she started to branch out to more and varieties, she knew bees would be beneficial for her garden and provide another homegrown food source!
Take a glimpse of our honey harvest in 2018 that produced over 13 gallons of honey!
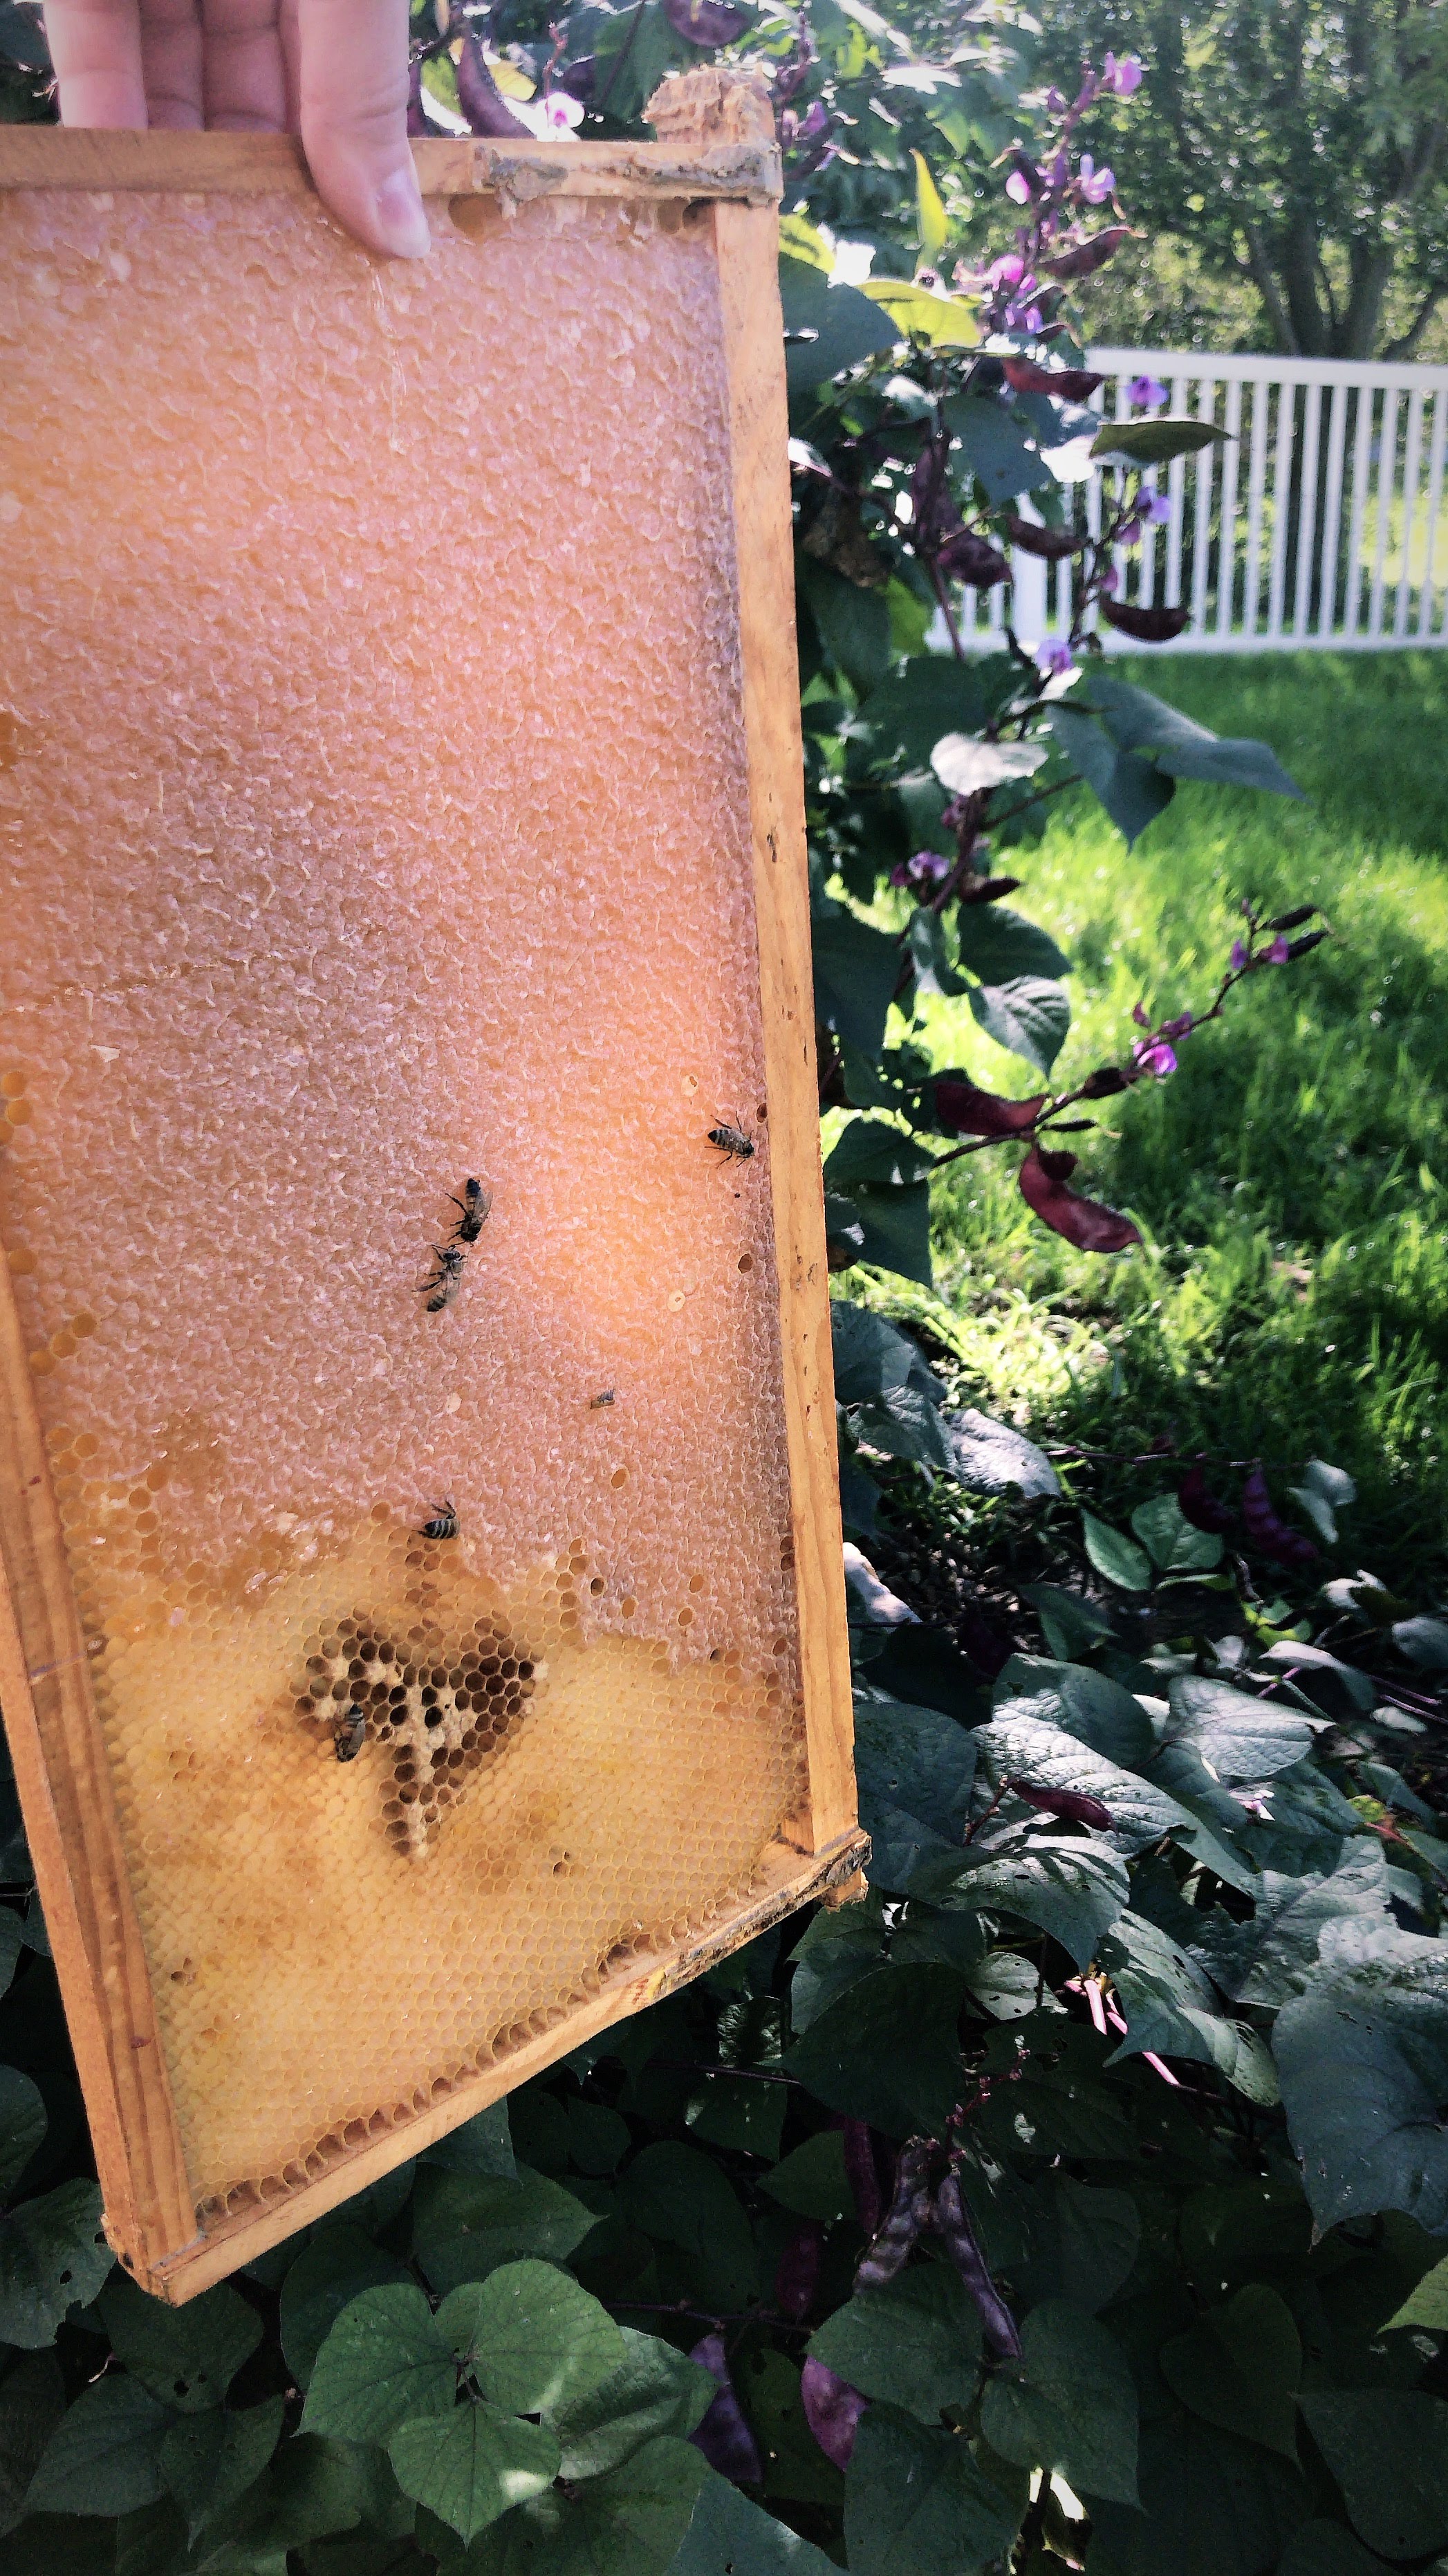
A day before harvest, the honey supers are removed from the hives. Each super has 10-12 “Frames” as you see there that have capped honey. The supers are removed a day early to let any remaining bees return to the hive. 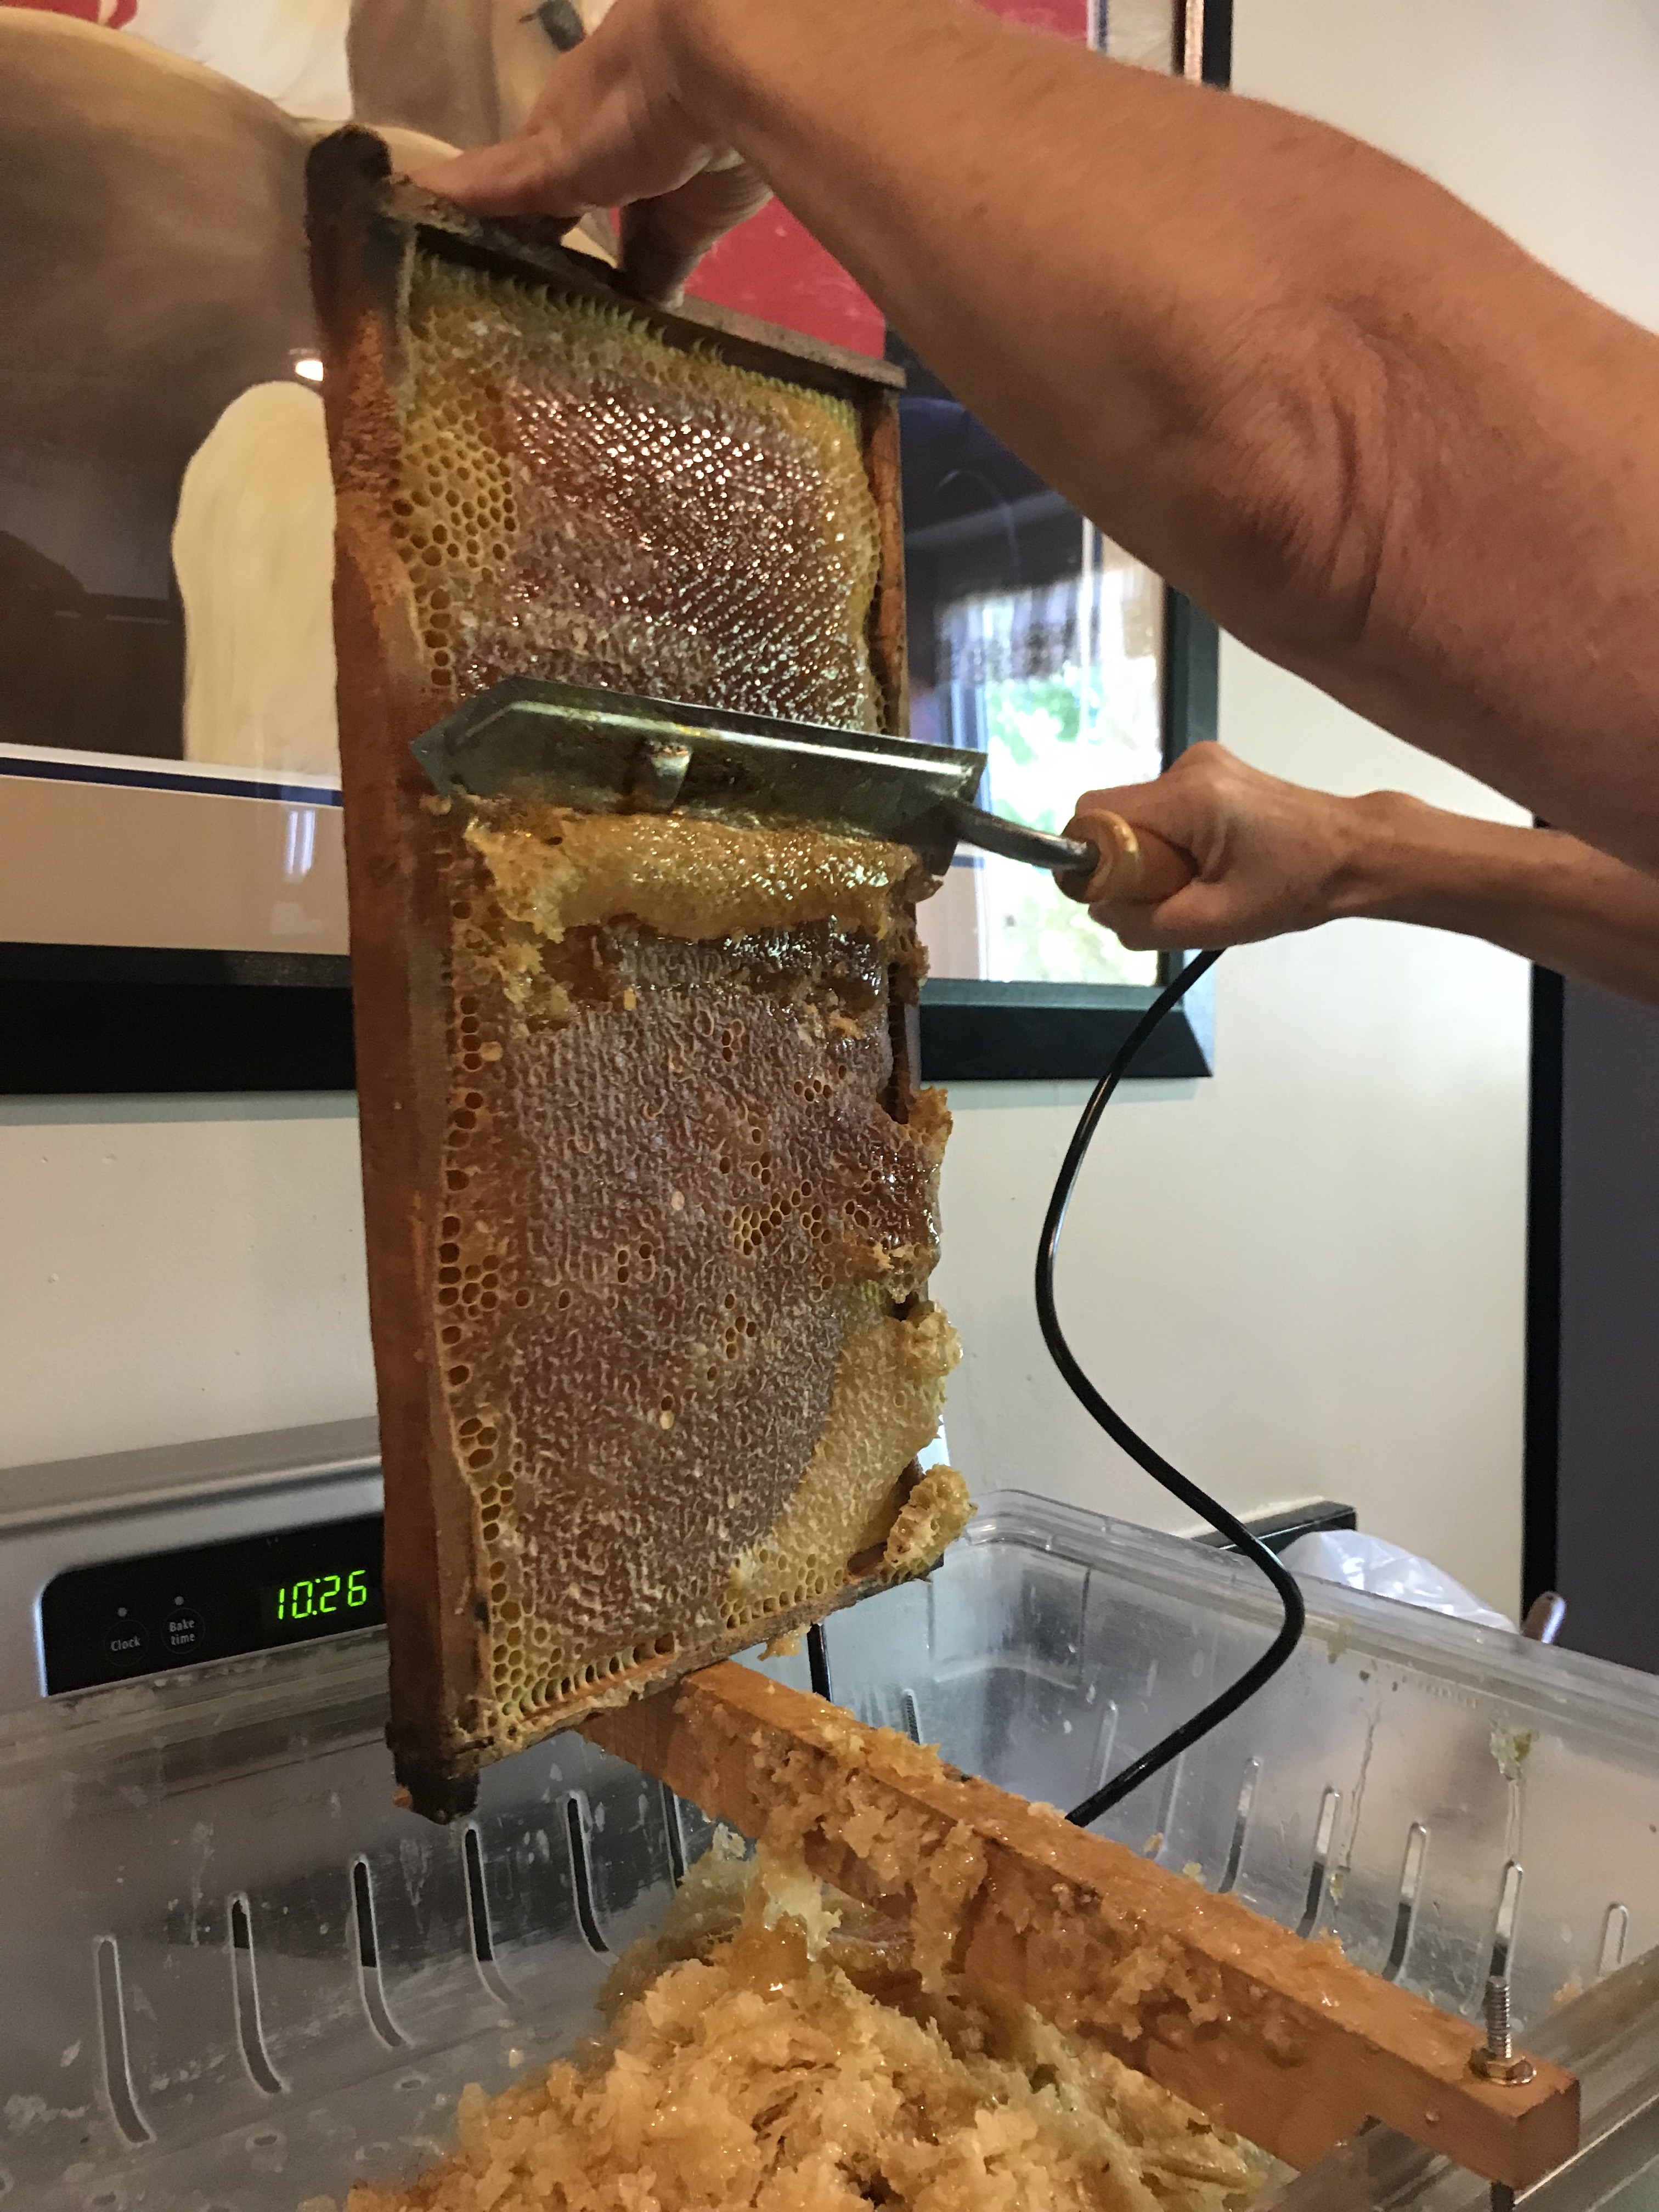
Next, each frame will be processed with a hot knife to remove the cap off of the comb. This is done over a large bin to capture the wax and any honey drip. 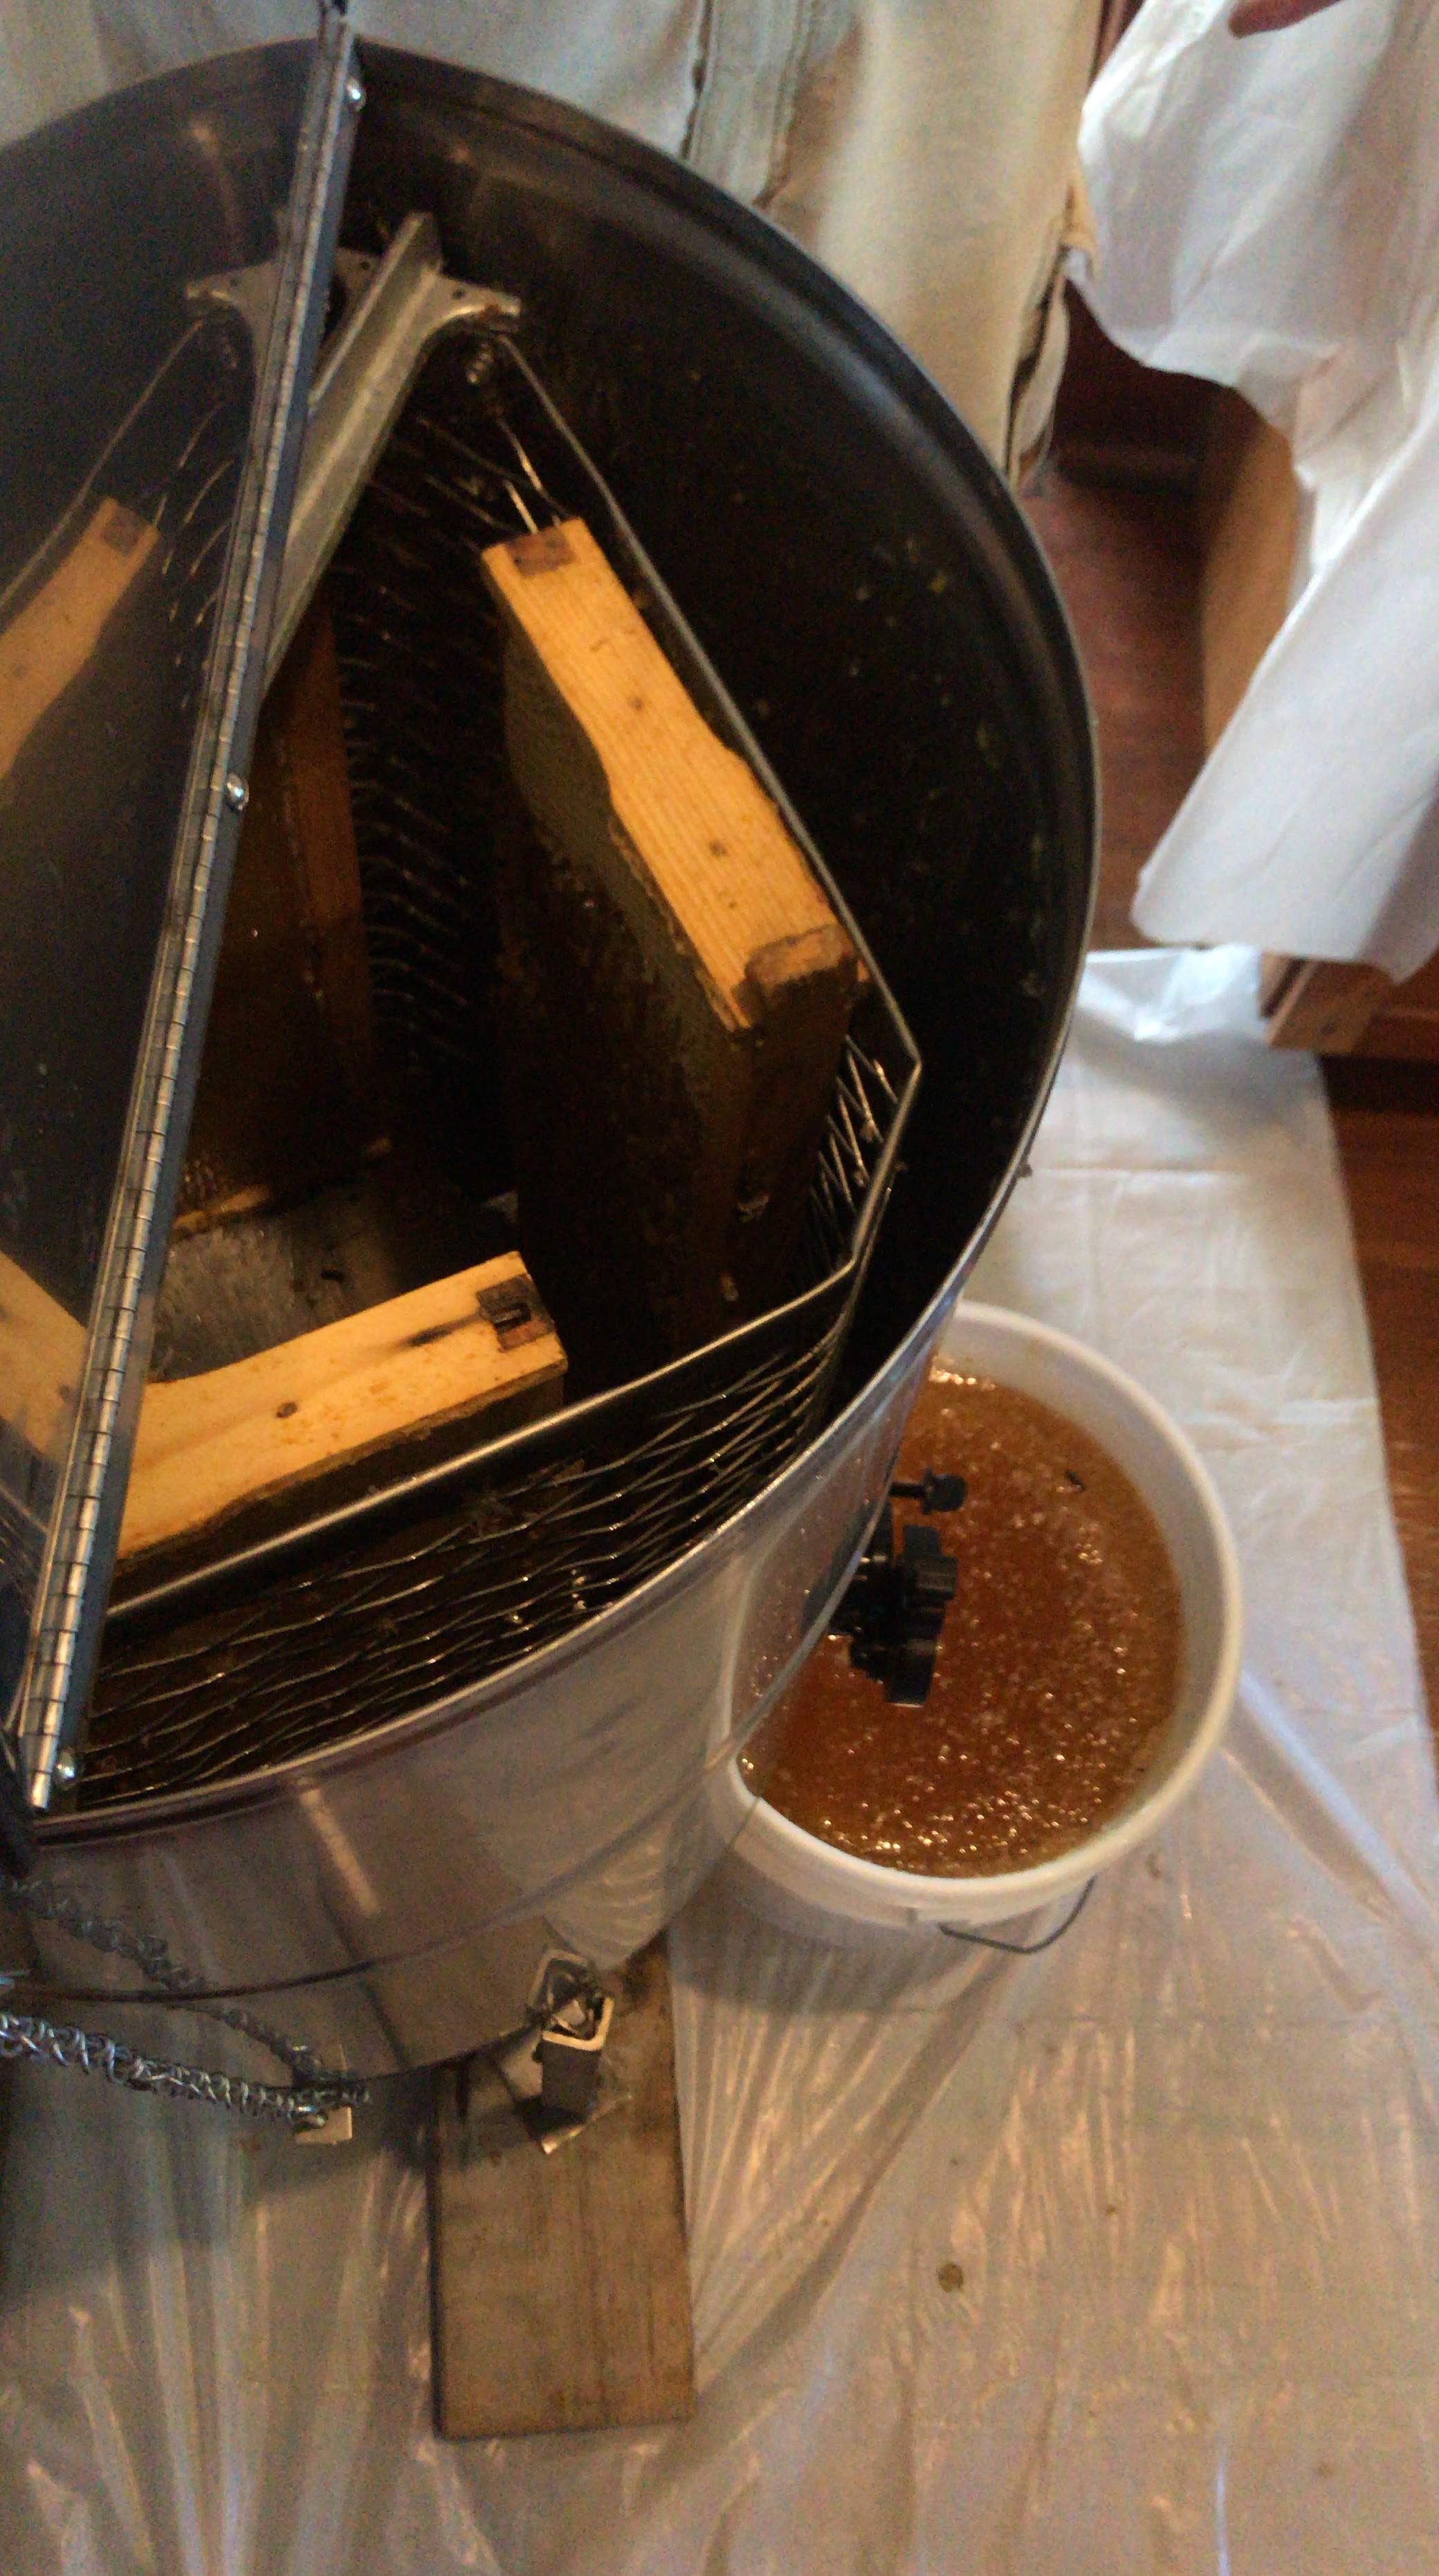
Each frame is then put into a honey extractor. The extractor uses centrifugal force to spin the honey out of each cell of the honey comb. 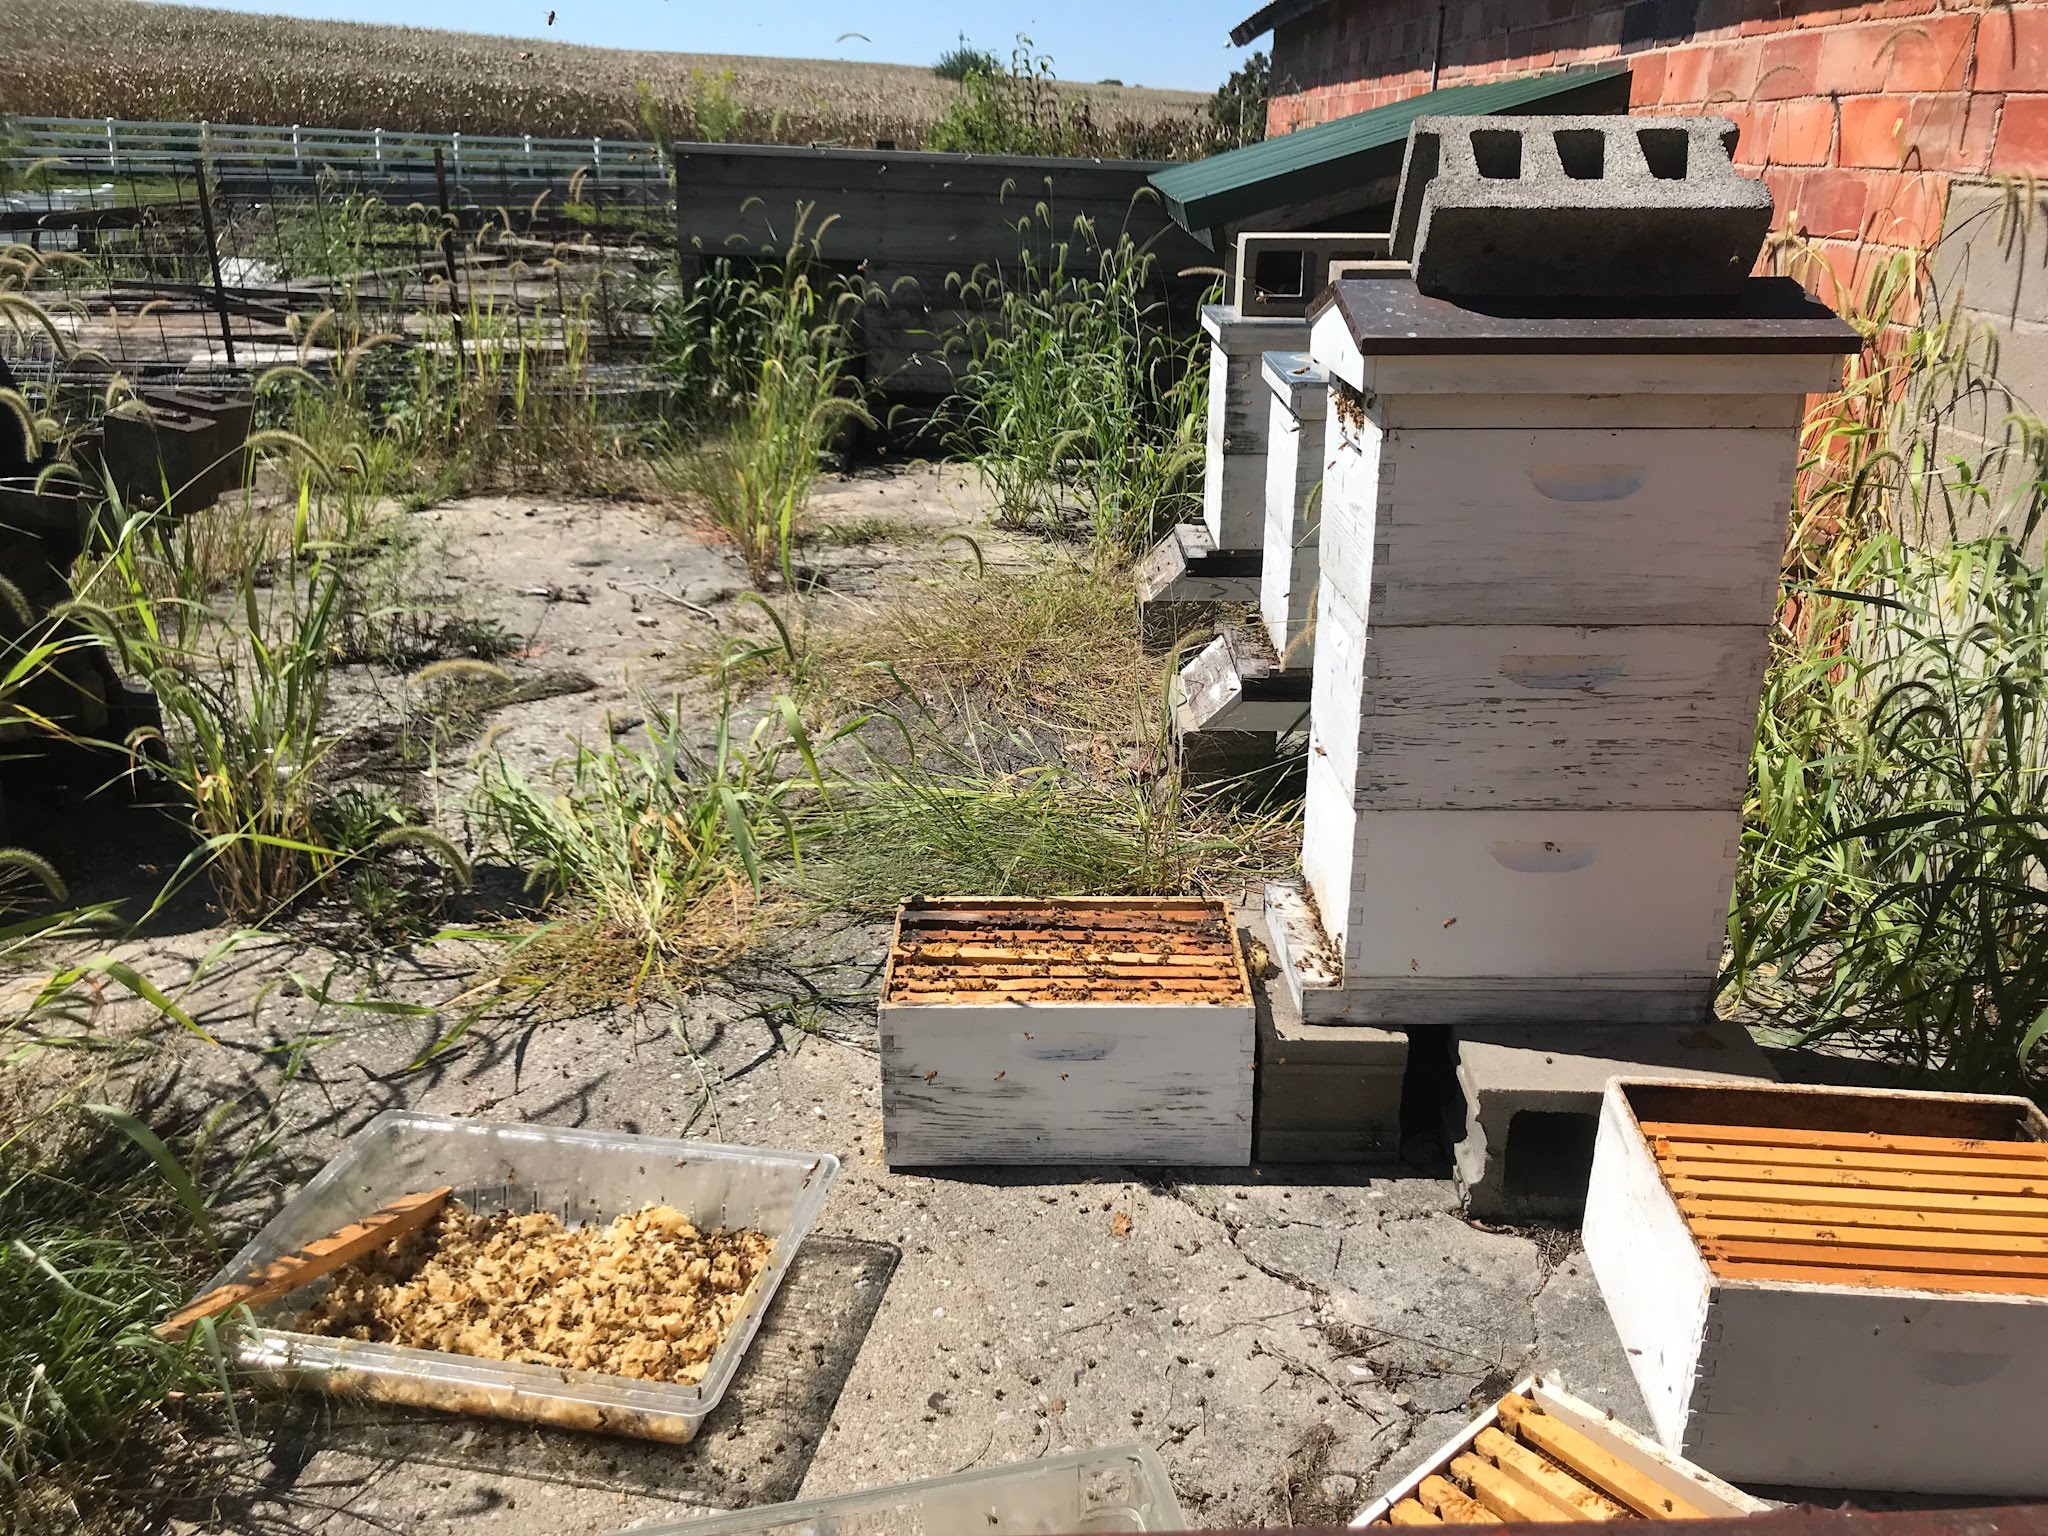
Lastly all of the remaining wax and boxes are set back out by the hives. The bees will reuse all of the wax and honey to start the process all over again. 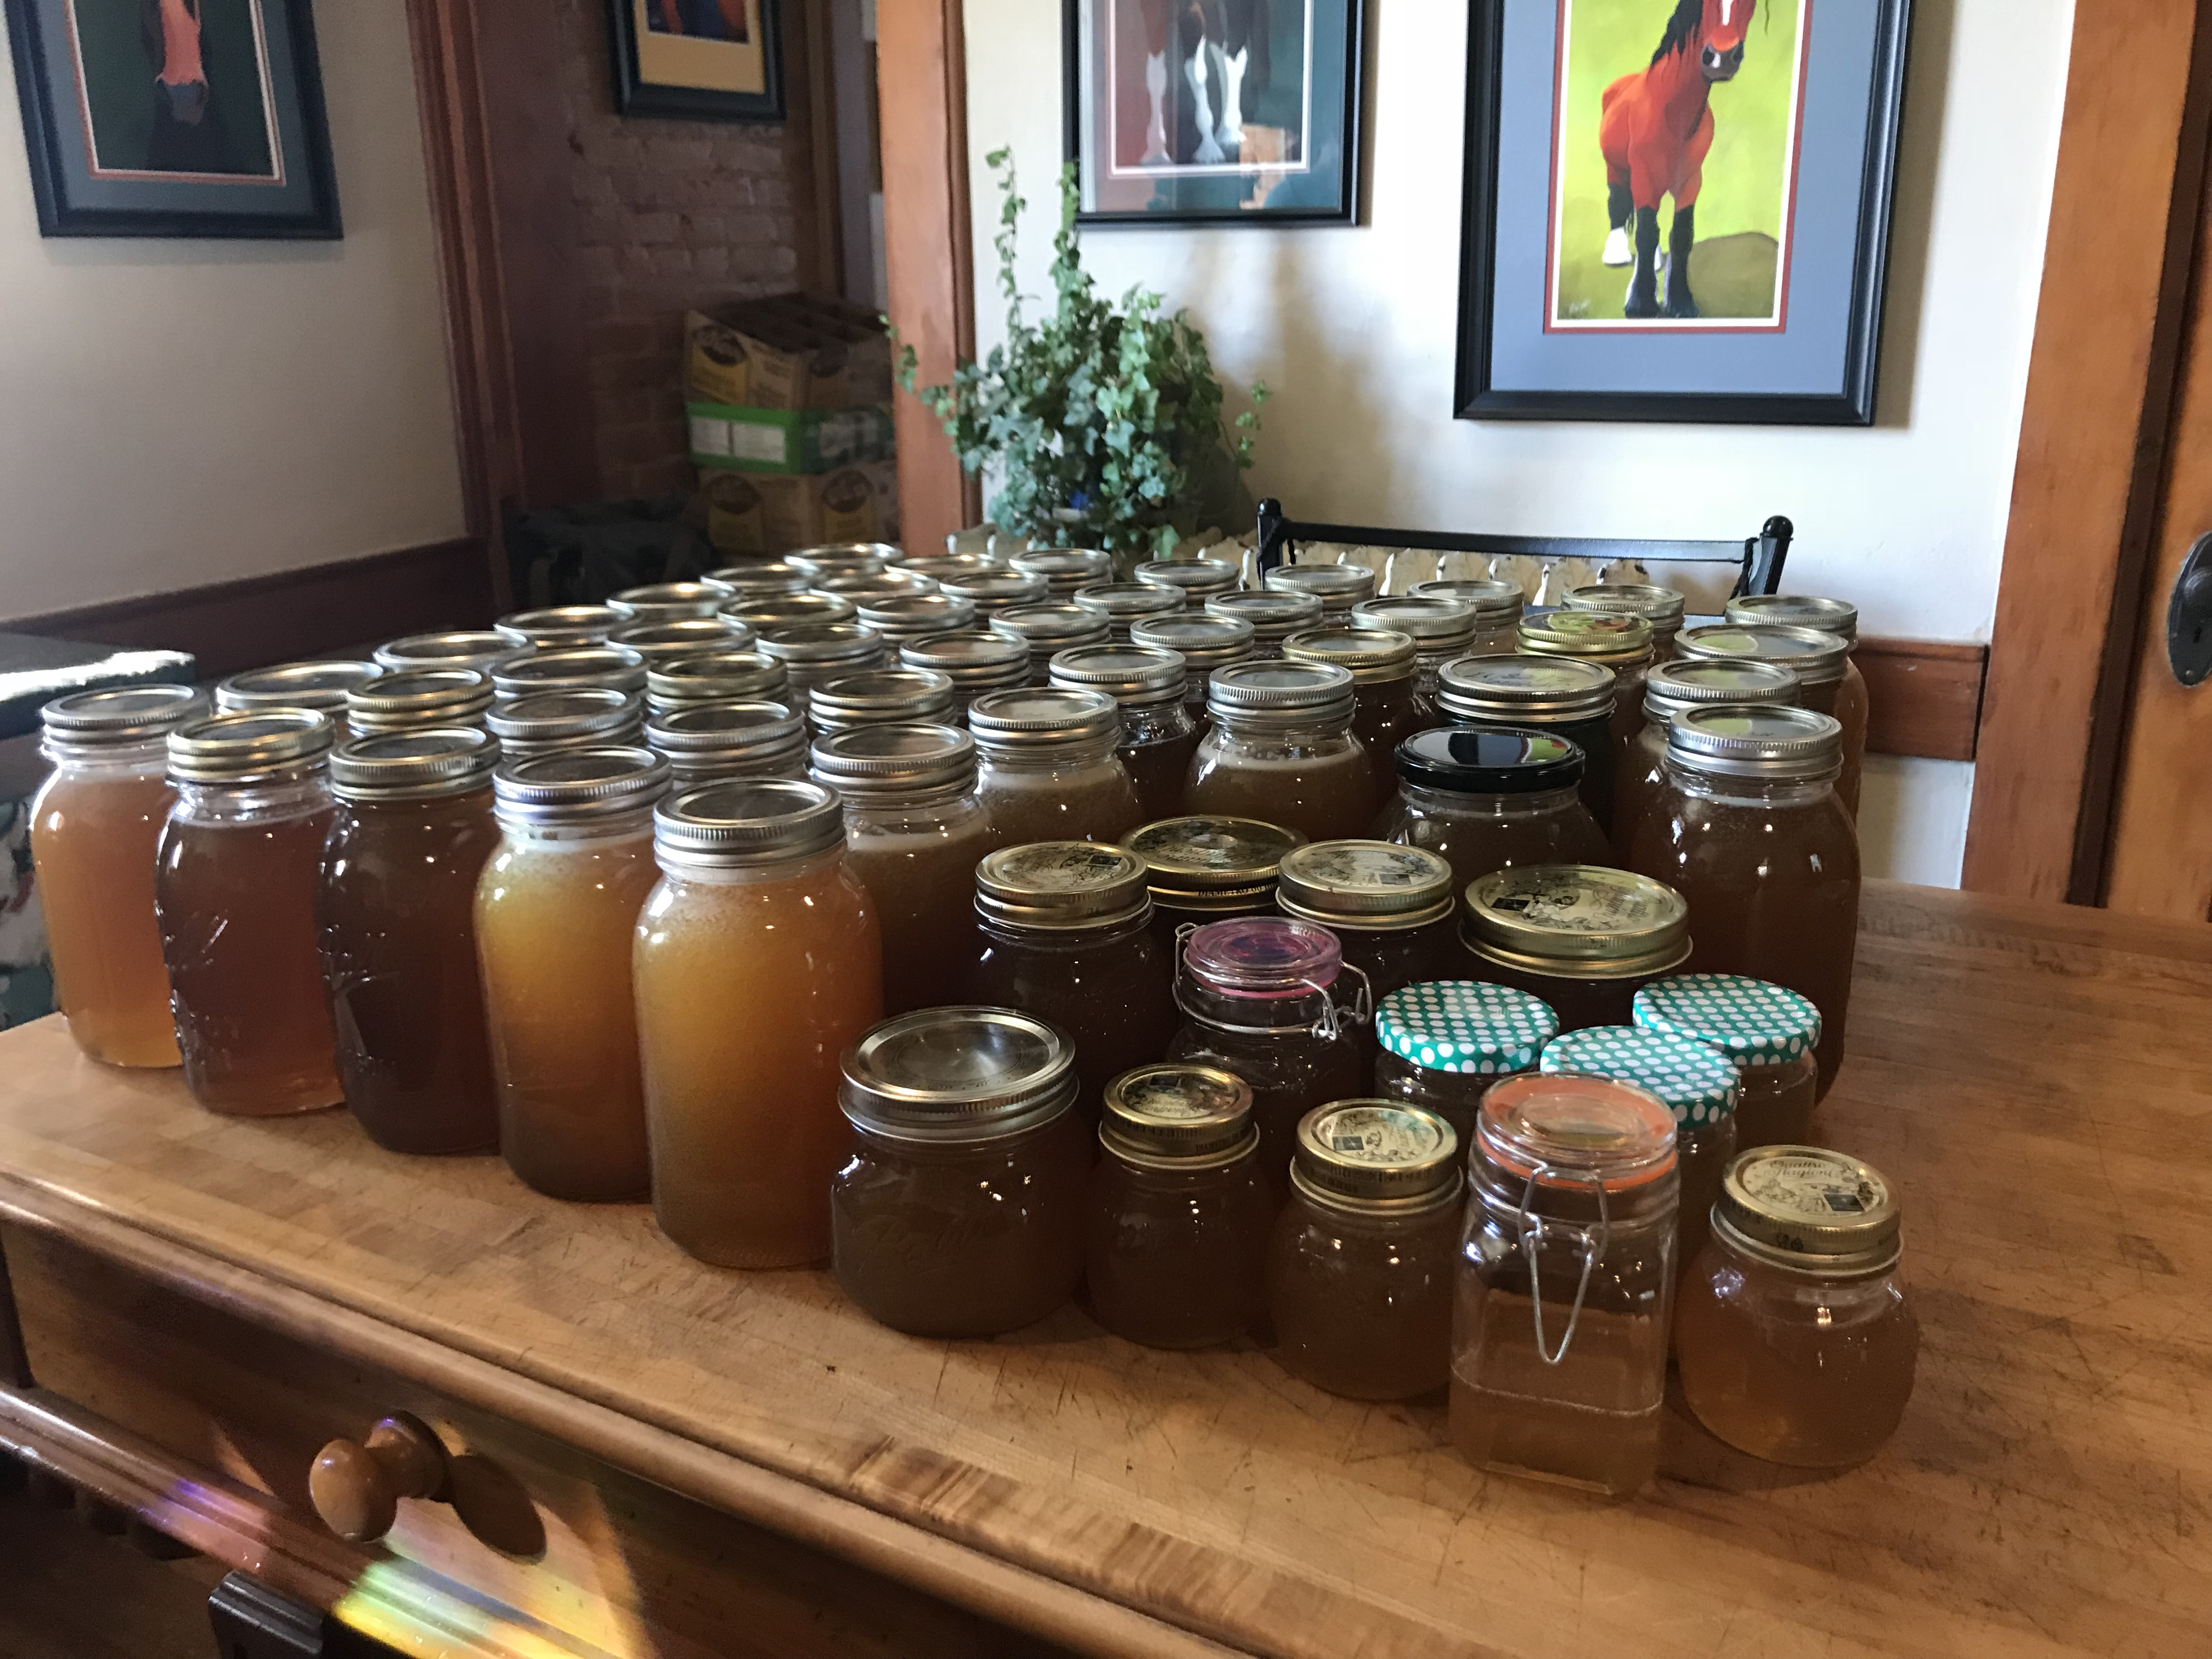
Over 13 Gallons of pure local honey! Note that the color difference is only due to the light passing through. Once the air bubbles settle, all of the honey will be nearly the same color.
Honey is used in our house as a replacement in many recipes for white sugar. Some of my favorite uses for honey include: tea, coffee, granola, oatmeal, breads, and yogurt. Historically, honey was used topically during wars to heal wounds like cuts and burns. Today, another one of my favorite face-masks is a simple mix of honey and cinnamon. Our family has quickly learned how versatile honey can be; from cooking to topical remedies, honey’s benefits can be seen throughout. I look forward to when I can raise my own hives of industrious worker bees.
Stay tuned for some honey packed recipes and uses!

Cilantro, Chives, Basil, Mint, Lemon Verbena, Lavender
These are just a few of my favorite herbs. I can always find a dish or tea to incorporate them into and bring my meals to life!
One of the easiest ways I’ve found to incorporate herbs into my daily life is by bringing them into my decor. I love having plants around to really warm up a space, now I’m just more selective of what type of plants I’m bringing in.
When Dustin and I moved into our townhouse, one thing that was clear was that I was bringing all of my plants with me. I love home decor – every season is a new opportunity to switch up your space. My style can be summarized by herbs and miscellaneous plants paired with simple farmhouse decor. Living in Iowa I have about a 5-6 month window of opportunity to have plants outside, the rest of the year I have to be creative with my indoor space.
Window sills are the key to smaller spaces. I filled our kitchen with a long and narrow planter that I am able to fill with 3-4 different herbs. I typically grow cilantro, chives, and basil because those are my favorites. This makes it very easy to use when in the kitchen, just snip and add to your favorite recipes! While those herbs are in their prime, I like to start another pot so they’re ready to enjoy when the other group is done, especially cilantro, whose lifespan is pretty short.
Other perennial herbs like lemon verbena and mint are my favorite “easy keepers”. They’re perfect herbs for drying and using for teas. The warm sunshine of summer is perfect for a couple of big harvests. To harvest these herbs, I simply snip the leaves off and leave them to dry on paper towels for approximately seven days or until dry and fragile. Store in mason jars until you’re ready to enjoy them!
Having homegrown herbs around the house makes for a bright touch especially in the middle of these Iowa winters! Whether they’re fresh-cut or dried, the reward of growing such a simple touch is extremely rewarding!

I love breakfast foods.
All of them.. the savory, sweet and of course, breakfast is better (if that’s possible) for supper. My husband rarely ate breakfast until I moved in, mostly because of the time it takes.
Now, Dustin and I love starting our day together with breakfast. One of our most favorite breakfasts is avocado toast with fried eggs. With our busy schedules, there are days sitting down for even 30 minutes is just not possible. These banana muffins make the perfect simple breakfast for work. I love popping it in the microwave to enjoy with my morning coffee.
When baking or cooking, I try to incorporate the things I already have in my kitchen. This Fall I made tons of Freezer Applesauce after we took a trip to our local orchard. I’d heard of applesauce as a replacement for oils, so I gave it a shot, and my oh my, it’s good!
If you read my applesauce recipe you know I like mine chunky, but don’t be alarmed, the applesauce breaks right down in the process of mixing the batter. This batter makes the perfect muffins, or drop it in a bread pan for a sweet loaf of banana bread. I prefer muffins because they make the perfect grab-and-go snack!
Okay, here’s the bread!
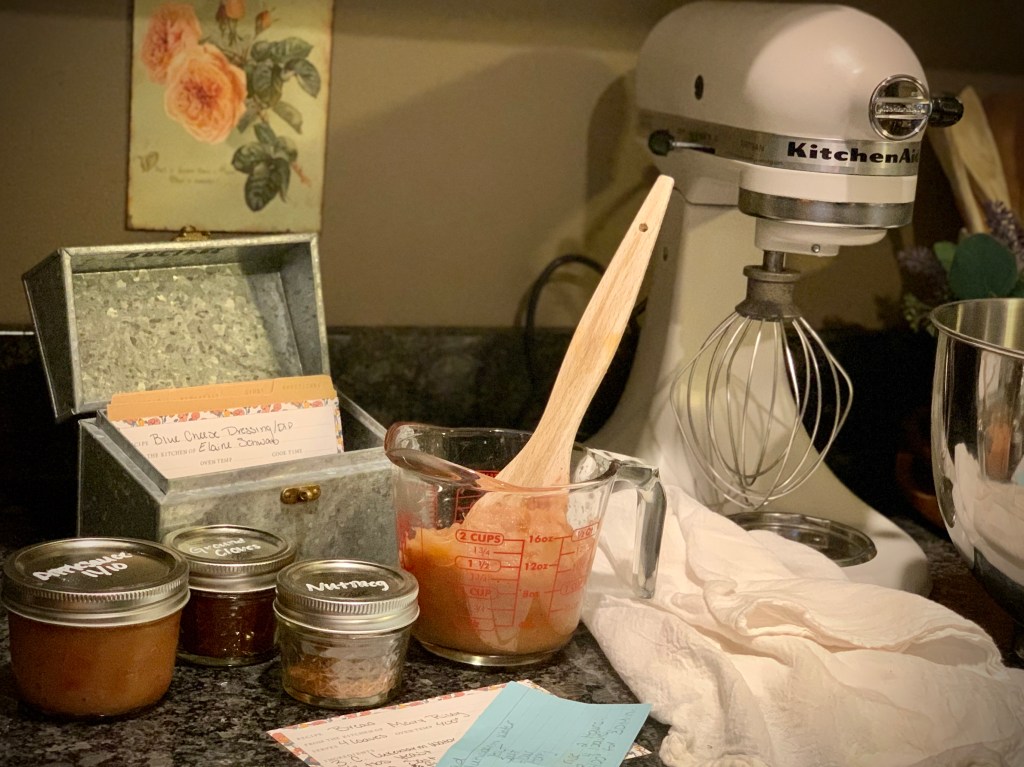
To start the batter, microwave the bananas and applesauce until they’re soft. While those are softening, preheat the oven to 350 degrees.
Once the bananas and applesauce are softened add to large mixing bowl and mix on low for 2-3 minutes. Mixing these will help breakdown any large chunks of banana or apple. After a few minutes add the eggs, vanilla and spices then mix on low.
With the mixer on low, slowly add in the sugar and flower. Mix until combined. Add the batter to a greased muffin tin, filling each tin 3/4 of the way full and place in the oven.
** TIP** place the oven rack one down from the center of the oven to cook the muffins evenly and keep the outside from burning.
Prep Time: 10 Minutes
Cook Time 20 Minutes
Total Time: 30 Minutes

Ingredients:
4   bananas
1/2 C   applesauce
2 tsp   baking soda
1 tbs   vanilla
3   eggs
1/4 tsp   nutmeg
1 tbs   cinnamon
1/8 tsp   ground cloves
1 C   sugar
2 C   flour
Directions:

1. Preheat oven to 450 degrees

2. Mix together bananas, applesauce, eggs on low

3. Next, add in vanilla, cinnamon, nutmeg and ground cloves

4. Slowly add in sugar and flower until combined.

5. Spray muffin tin with cooking spray and fill 3/4 full with banana bread mix

6. Cook for 20 minutes or until golden brown. TIP: Use a toothpick by sticking into the bread, if it comes out a little sticky, they're done! They muffins will continue to cook as they cool.

7. Cool on bakers rack or enjoy warm

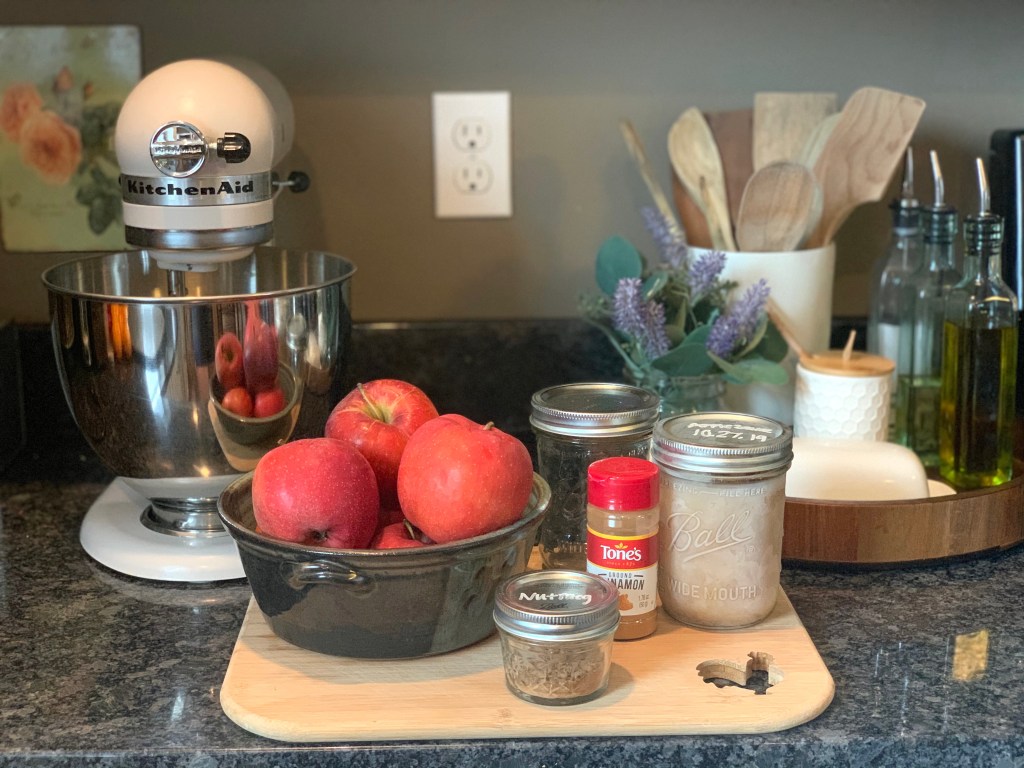
Is there anything that says Fall better than cool weather, the leaves changing and apples? I sure don’t think so. This year one of my goals was to be more sustainable and this was the inspiration for our trip to our local orchard.
I’ve always loved homemade applesauce, being able to control the texture, flavor, and sweetness with our own homegrown honey. After going to the orchard this year we had an abundance of apples and Freezer applesauce is simple and allows us to enjoy the apples over the next several months. So here’s my take on a simple, yet delicious side.
The Sauce.
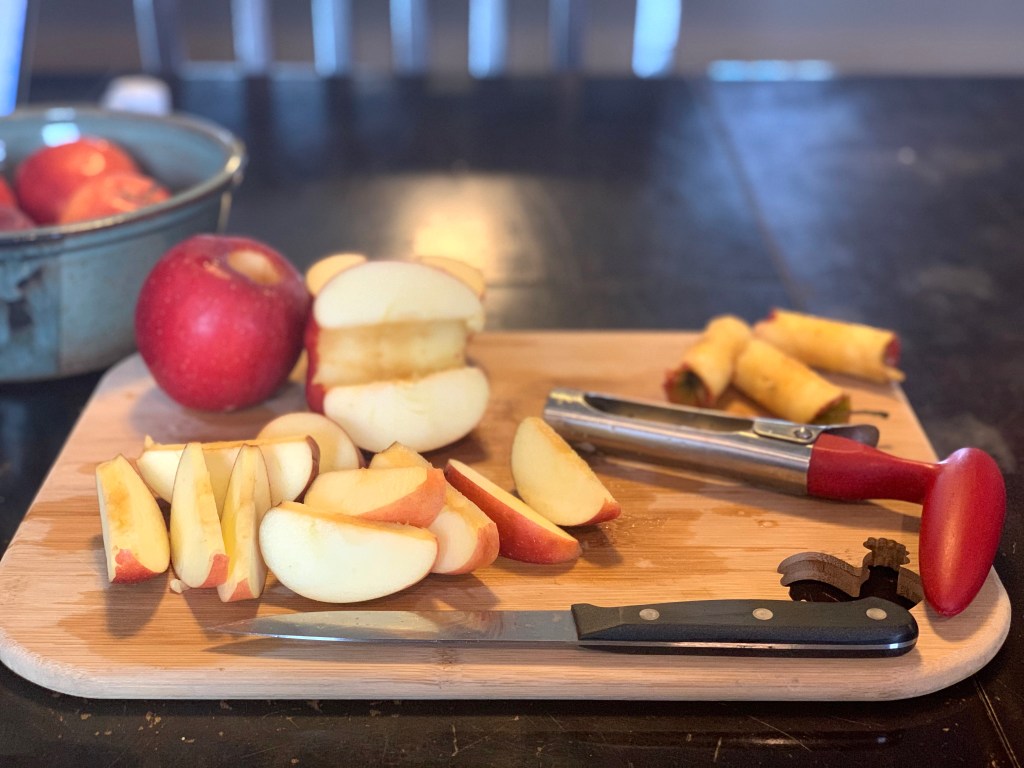
Start by washing and coring 7-10 Medium sized apples. I personally like texture in my applesauce, so I don’t like to take the skins off! Add apples to a large covered pan on low. Add a cup of water or apple juice/cider to help the apples soften. I use water because I don’t want mine too sweet and I like to control the flavor more. Then add cinnamon, nutmeg and honey and cook until apples are completely softened.
Then use an immersion blender (any regular blender will work just fine!) to breakdown the apples even further. Depending on how smooth you want your applesauce will change how much you blend. I like to make sure, when I’m using the immersion blender, that I am getting most of the skins to breakdown so there are no large pieces.
The Jars
While the apples are cooking down, it’s a great time to get the jars ready. I sanitize the jars by placing them in a vat of hot water for 5-10 minutes, then let dry completely.
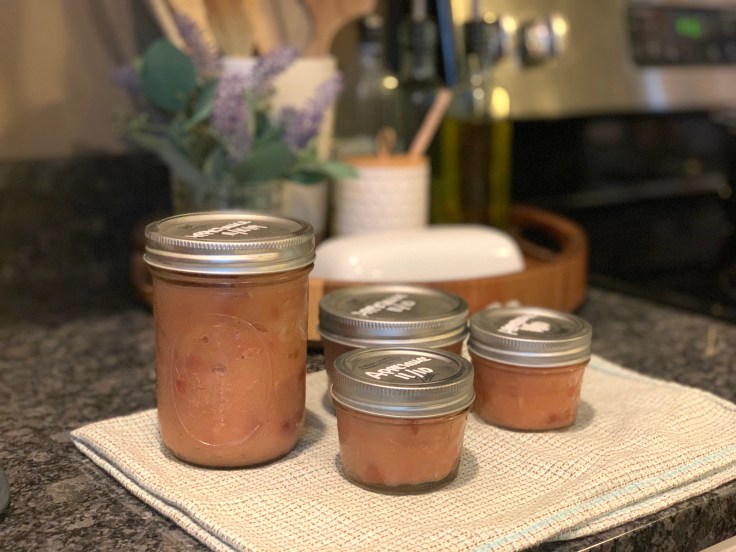
Once the applesauce is done, fill the jars leaving at least an inch at the top to allow for expansion when they go in the freezer. Mason Jars actually have a line at the top of the jar showing you how full to fill them. Once the jars are filled wipe down the rims to remove any remnants that would interfere with the seal and screw on lids. I love to use paint pens to write on the lids. This keeps the “label” nice in the freezer and then easily washes off of so they can be reused! Label and place in freezer until your ready to enjoy!
I like to use a variety of sizes for the jars. Larger jars are great serving for supper or larger family events, while half pint jars for baking or single servings, great for lunches or traveling (plus they keep your lunch cold!). I love grabbing these little applesauces, they make easy, homemade, no waste snacks!
Recipe: Freezer Applesauce

Prep Time 10-15 Minutes
Cook Time: 20-30 Minutes
Total Time: 1 Hour

Ingredients:
7-15    Medium Apples
1 C     Water
2 TBS   Honey (To Taste)
1 TBS   Cinnamon
1/2 TSP Nutmeg
1 TBS   Brown Sugar
Directions
1. Core and slice apples. Put in large pan on low heat and add water.

2. Add Honey, Cinnamon, nutmeg, and brown sugar. Continue cooking down until apple are tender.

3. Pull apples off heat and use blender to breakdown to desired consistency.

4. Cover jars in vat of water for 5-10 minutes. Let dry completely.

5. Add applesauce to jars, leaving 1-1.5 inches at top to allow for expansion.

6. Put jars in freezer 2-3 hours with lids on loosely. Once applesauce has cooled, tighten lids completely label and store.